When it first became possible to capture unprocessed iPhone camera data with the API introduced in iOS 10, I remember being shocked by the images I saw. Here are the same unedited sample photos I showed in my review of the feature, both shot on an iPhone 6S:
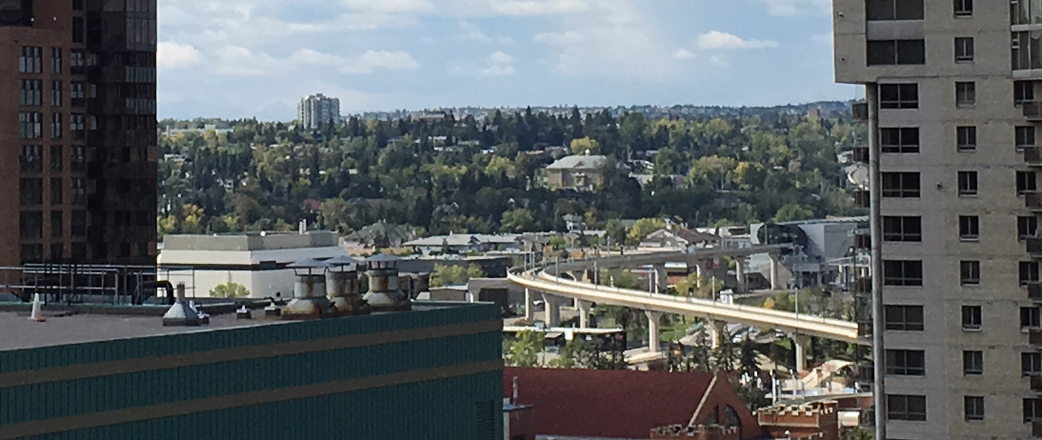

Even on a camera from five years ago, you can see crisp edges on the windows of the building across the street, texture on the roof of the castle-like armoury in the bottom-centre, and more fidelity in the trees. Because RAW photos preserve the data straight off the sensor, they also allow for more editing flexibility. It is possible to precisely adjust the white balance, instead of simply making the image more orange or blue, and you can recover shocking amounts of detail in shadows and highlights in a way that simply is not possible with compressed and processed images.
Over time, the availability of this API has paid off as every new iPhone’s camera gets a little bit better. And I do mean little:
| iPhone 6S | iPhone 12 Pro (Wide) | |
|---|---|---|
| Megapixels | 12 | 12 |
| 35mm Equivalent | 28mm | 26mm |
| Aperture | ƒ2.2 | ƒ1.6 |
| Pixel Size | 1.22μm | 1.4μm |
These are literally microscopic changes, but they have a big impact with the tiny lens and sensor of a smartphone. As a result, I have been able to capture photos with better dynamic range and more detail than I would have thought possible for a phone using third-party apps like Halide.
The numbers above only tell part of the story, though. Today’s iPhone photography is only half about what the camera actually sees; the other half is about how that individual image and its contents are interpreted. Skies and skin tones are separated to be colour-corrected and have noise reduction applied specific to those typical image elements; in poor lighting, multiple images are combined so that noise can be reduced without compromising texture and detail. If you are shooting RAW images you are, by definition, not taking advantage of any of these computational photography advancements. But what if it were possible to combine the two?
The release of iOS 14.3 includes support for something Apple calls “ProRAW”, available on iPhone 12 Pro and 12 Pro Max models. Here’s how Apple describes it:
Apple ProRAW. For an absurd amount of creative control.
ProRAW gives you all the standard RAW information, along with the Apple image pipeline data. So you can get a head start on editing, with noise reduction and multiframe exposure adjustments already in place — and have more time to tweak color and white balance.
This is the first time RAW photography has been available in the first-party Camera app, so of course it has been done in a typically Apple way: it’s RAW, encapsulated in the industry-standard Digital Negative file format (DNG), and it has a bunch of little tricks that make it different from unprocessed RAW photographs. This is not going to be the kind of in-depth guide that the Lux team is able to put together. These are also not going to be particularly exciting images. These are merely some impressions after using and editing ProRAW for about a month.
The short version of my findings is that ProRAW bridges the gap between the fidelity and flexibility of a RAW photo and the finished product of a processed image — and whether this is what you want, as a photographer, is going to depend hugely on capture circumstance and what you are hoping to achieve. That sentence is pretty vague, so let me show you a few examples.1
Let’s start with this picture of Calgary’s hopelessly Soviet west side:
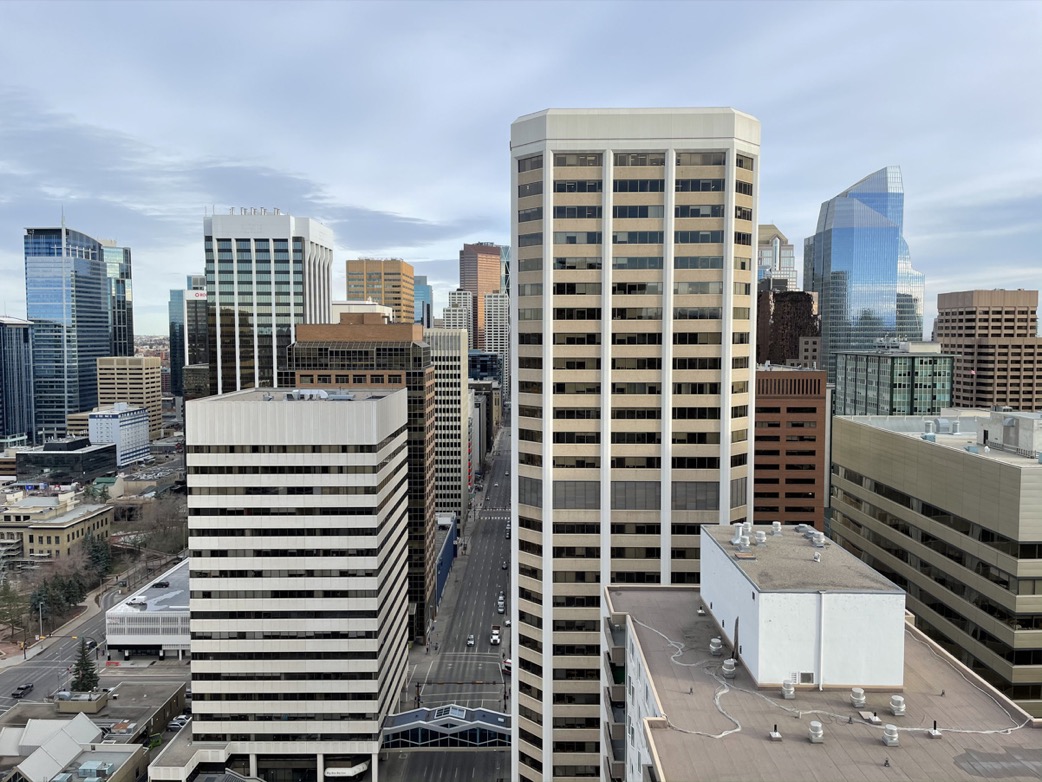
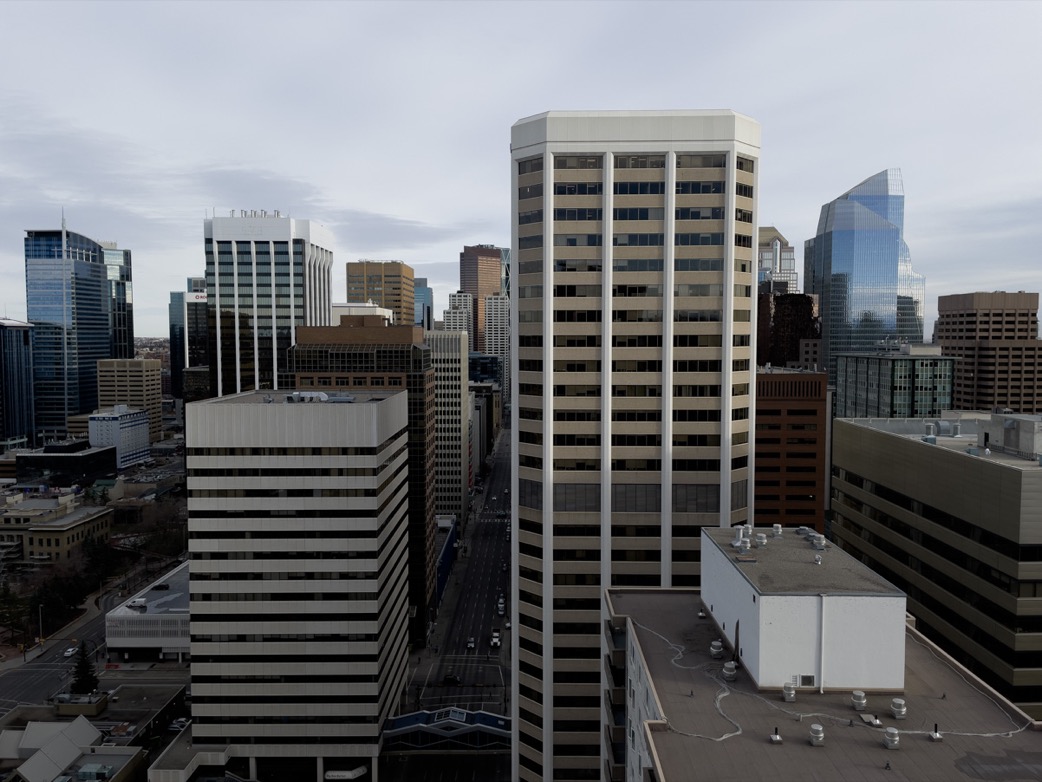

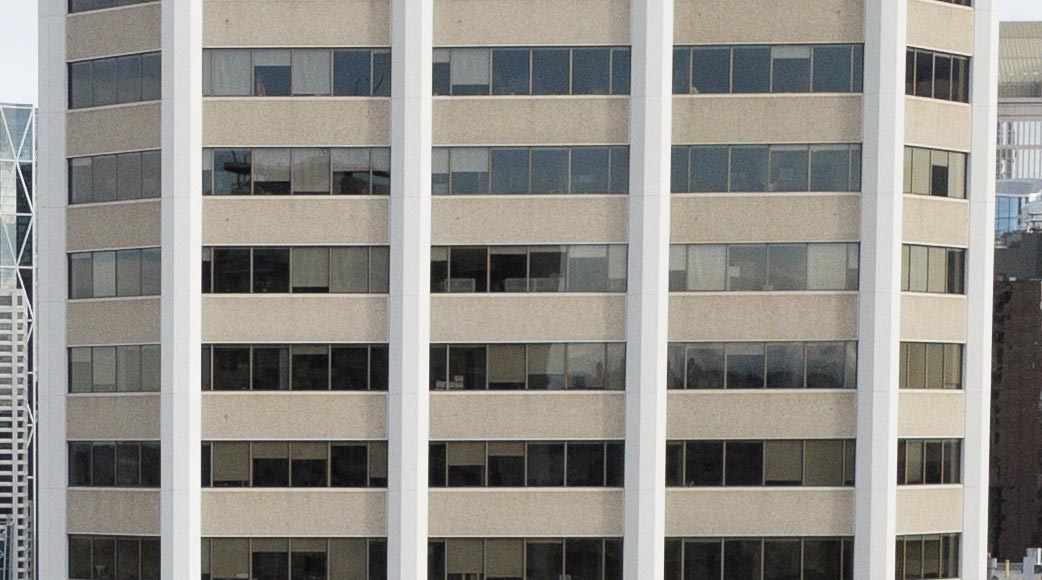
You can already see many differences, but I want to highlight a few specific areas. I’m going to start at McDougall Centre on the left-hand side of the image midway down:
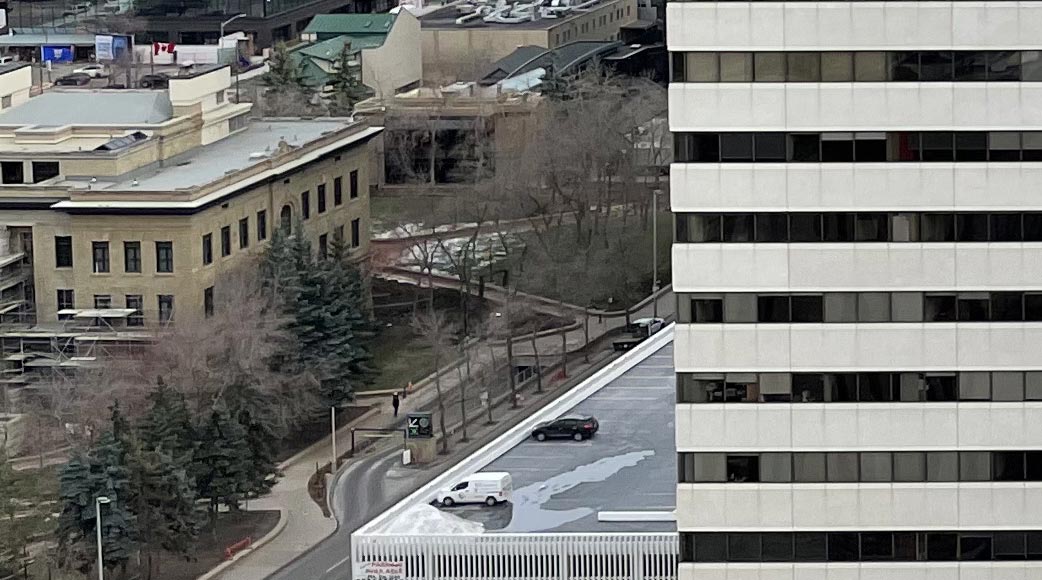
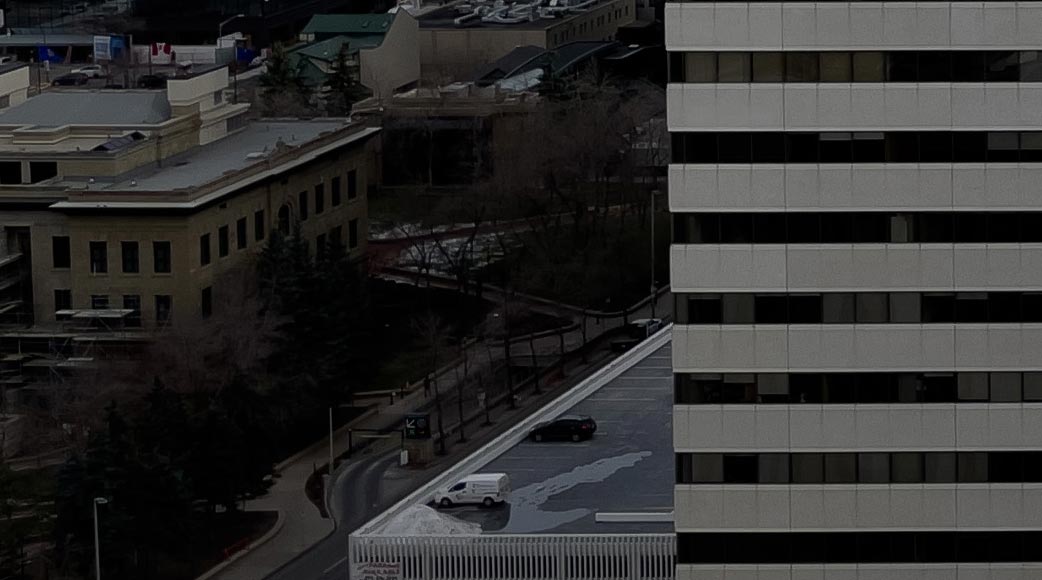
There’s a lot of fine detail in this area: trees, windows, flagpoles, sandstone, and scaffolding. The HEIC image gets to take advantage of HDR processing to better balance highlights and shadows, but there’s almost no fidelity left in this area. The Bob Rossian trees and Dali windows look fine when you’re looking at the whole image at a normal size, but as you zoom in, the illusion is revealed.
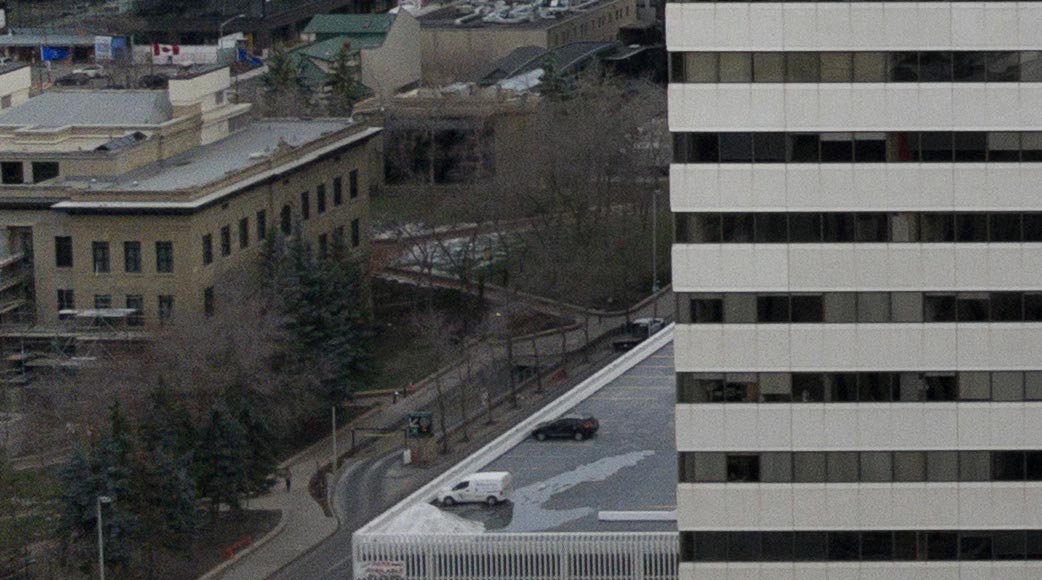
The two RAW files are interesting, though. Both images were taken with similar settings, but if I told you that one of those was taken with a faster shutter speed than the other, you might have assumed it was the one that is darker overall. It turns out that the Halide image is the one that was shot with a slightly shorter exposure time, yet it is the lightest of these two; the ProRAW file is handled differently, which is something I will get to a bit later. However, comparing unprocessed RAWs kind of defeats the point of the RAW format, so I edited both images to be more similar:
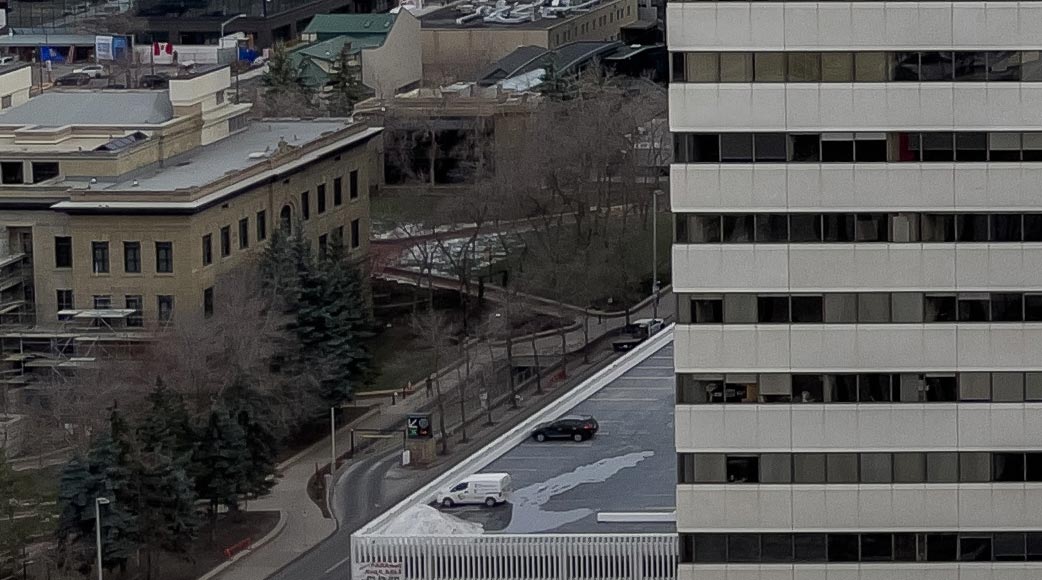

The ProRAW image stands out as being more defined and less noisy. There’s a black SUV on the rooftop parking lot at the bottom of the image and, in the ProRAW image, you can see its chrome door handles; in the Halide image, they simply don’t show up. No matter how much I fiddle with various contrast, definition, sharpness, and detail sliders in Lightroom, I just don’t see those handles in the Halide-captured image nor in the standard HEIC photo, but they are clearly present in the ProRAW one.
The ProRAW image is, overall, noticeably crisper without much editing, to the point where it almost looks like someone has artificially dialled up edge clarity. The Halide image is softer and noisier, but I noticed that I could push it further than the ProRAW file without it looking so aggressively retouched.
Let’s move to the concrete building in the foreground:

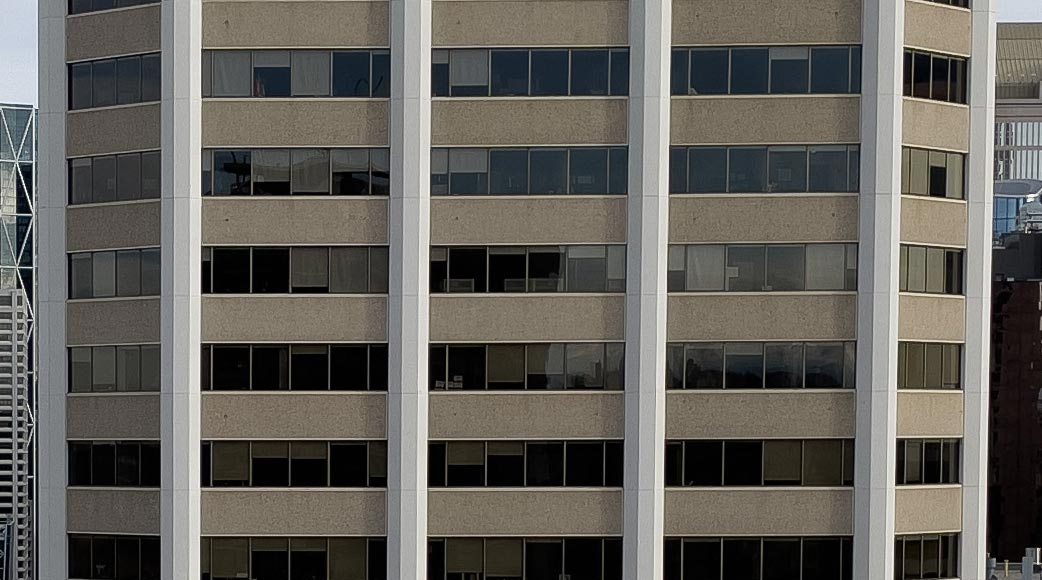
The noise reduction applied to the HEIC image has completely erased the texture of the concrete, but in the ProRAW image, you can see how stippled it is. The Halide RAW image shows the difference between an unprocessed image and the adjustments applied by ProRAW: ProRAW appears simultaneously sharper and less noisy than the standard RAW file. How is this possible?
The readout from the DNG files gives us some clue. Here’s what Halide’s shows:
AsShotNeutral: 0.445, 1, 0.543
BlackLevel: 528
BlackLevelRepeatDim: 1, 1
CalibrationIlluminant1: 17
CalibrationIlluminant2: 21
CFAPlaneColor: 0, 1, 2
ColorMatrix1: 1.227, -0.545, -0.261, -0.455, 1.518, -0.043, -0.041, 0.164, 0.591
ColorMatrix2: 0.915, -0.322, -0.126, -0.429, 1.31, 0.095, -0.106, 0.235, 0.431
DNG Backward Version: 1.3
DNG Version: 1.4
NoiseProfile: 128, 2,405,087,193,192,881
NoiseReductionApplied: 0
Unique Camera Model: iPhone13,3 back camera
WhiteLevel: 4,095
And here’s the readout from the ProRAW file:
AsShotNeutral: 0.446, 1, 0.544
BaselineExposure: 0.832
BaselineSharpness: 1.5
BlackLevel: 0, 0, 0
CalibrationIlluminant1: 17
CalibrationIlluminant2: 21
ColorMatrix1: 1.227, -0.545, -0.261, -0.455, 1.518, -0.043, -0.041, 0.164, 0.591
ColorMatrix2: 0.915, -0.322, -0.126, -0.429, 1.31, 0.095, -0.106, 0.235, 0.431
DefaultBlackRender: 1
DNG Backward Version: 1.3
DNG Version: 1.4
NoiseProfile: 0, 0
NoiseReductionApplied: 0.95
Profile Name: Apple Embedded Color Profile
Unique Camera Model: iPhone13,3 back camera
WhiteLevel: 65,535, 65,535, 65,535
Minor differences aside, I want to draw your attention to three tags: BaselineExposure, BaselineSharpness, and NoiseReductionApplied. Adobe’s DNG spec (PDF) explains those tags in detail. As far as I can work out, those represent at least some of Apple’s special sauce: the RAW file already has corrected exposure, noise reduction, and sharpness, even before the photographer edits it. I found the latter two values to be consistent across images; it applies the same sharpness and noise reduction values regardless of the scene, but the BaselineExposure value varies.
One of the cool things about the DNG format is that, because these are tags applied as adjustment to the contained image data, we can edit those tags using exiftool. I was unable to change NoiseReductionApplied, but I modified a few other key tags, and this is the result compared to the base ProRAW:
BaselineExposure set to 0, BaselineSharpness set to 0, and BlackLevel changed from 0 to 528, the same as the Halide RAW photo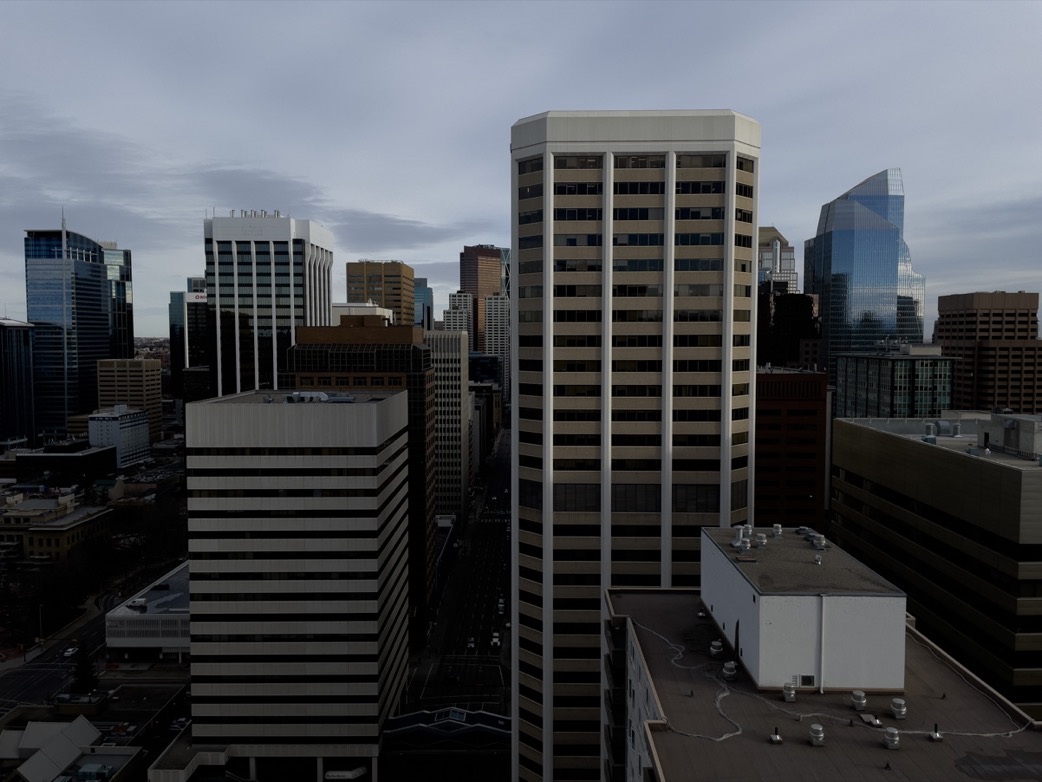
That’s pretty dark. Let’s change one more thing — the WhiteLevel from 65,535 in the ProRAW file to the 4,095 value in the Halide file:
BaselineExposure set to 0, BaselineSharpness set to 0, BlackLevel changed from 0 to 528, the same as the Halide RAW photo, and WhiteLevel changed to 4,095 to match Halide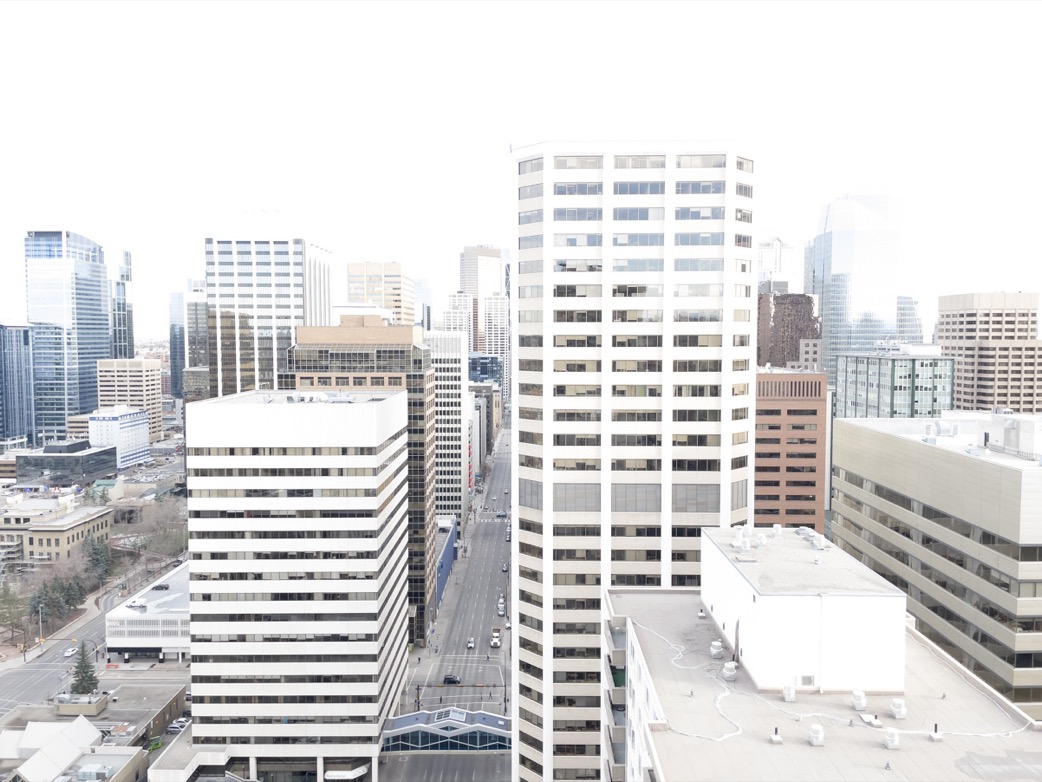
Lovely.
RAW image data that is kept in a DNG file might have different amounts of detail available to a third-party app based on the settings of that DNG file. These are differences that appear before the image is ingested into a RAW workflow. All of this is to say that at least some of the secret sauce of ProRAW appears to be about how its data is encapsulated. But wait — that’s not all. There is one more thing these images will not tell you, which is the size of the DNG files. The ones produced by Halide and Manual are in the 10–12 MB range, and Obscura’s tend to be around 13–16 MB — but ProRAW files are 20–30 MB. That is a big leap.
I am not sure why ProRAW files are twice as big or more compared to the RAW files from third-party apps. A big reason for this, I assume, is that the files are 12-bit, which accounts for about half that difference. I expect someone more capable will explain this better, because I am out of my depth here.
Let’s look at a different picture. This one was shot indoors and lit by diffuse daylight from a large window, and I tapped to focus on the nearest leaf.
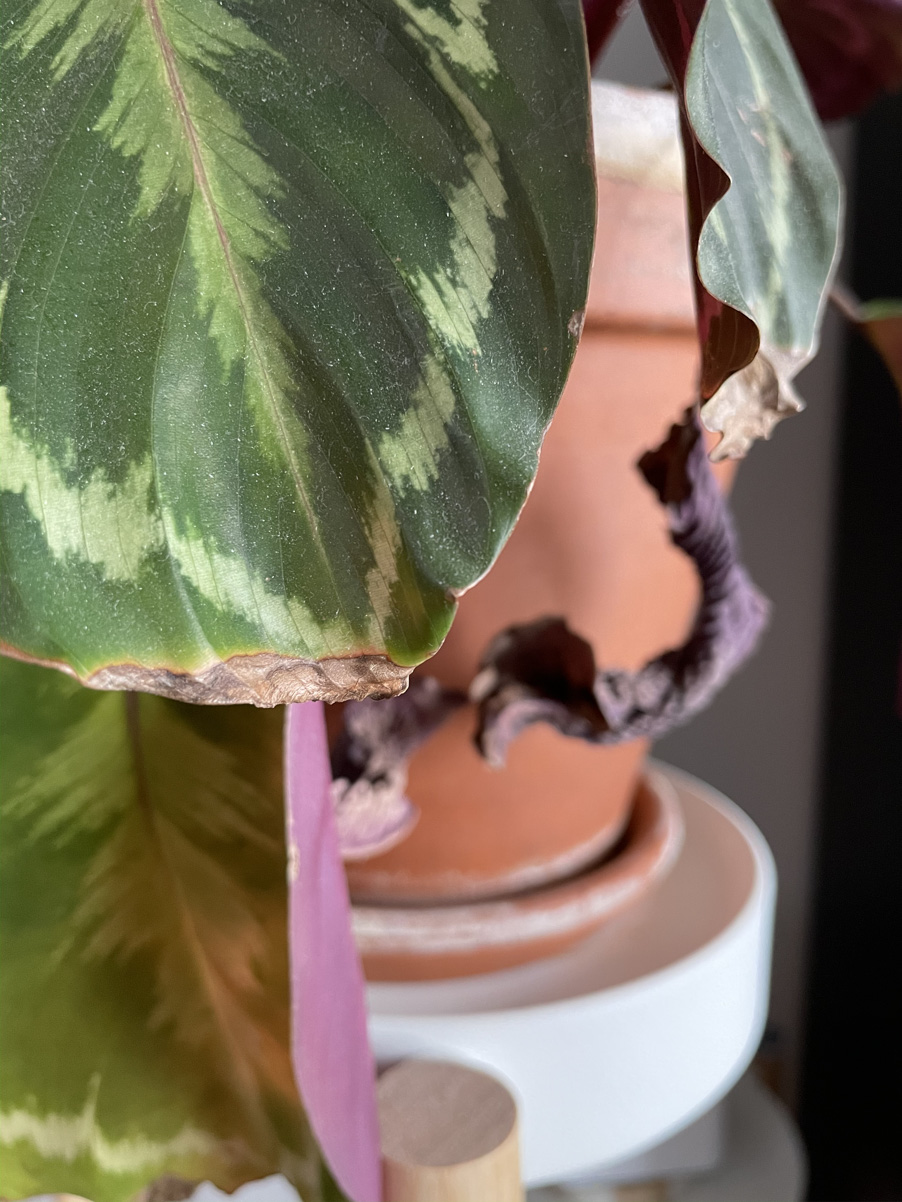
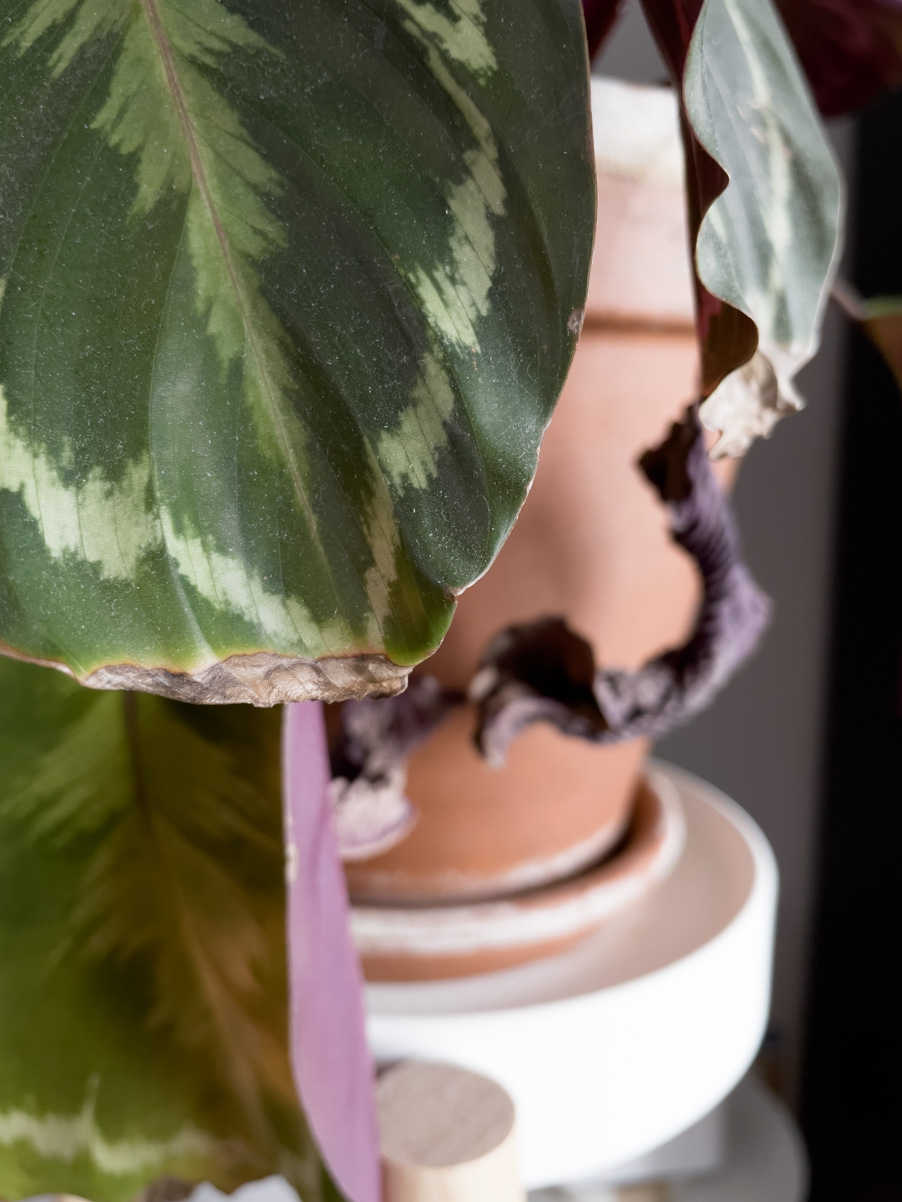

We can see a few things pretty clearly here:
The images produced by the default Camera app look very similar.
Despite using near-identical camera settings, the Halide image is far brighter.
The HEIC image has more detail of the embarrassing amount of dust on the leaf, and better-balanced highlights. If you guessed that this is a Deep Fusion image, you’d be right.
The out-of-focus areas in this image also look less natural than those in the two RAW photos. I suspect this is a Deep Fusion side effect.
Because the Halide and ProRAW images are so different, I have processed the photos for these 100% crops to look more similar:
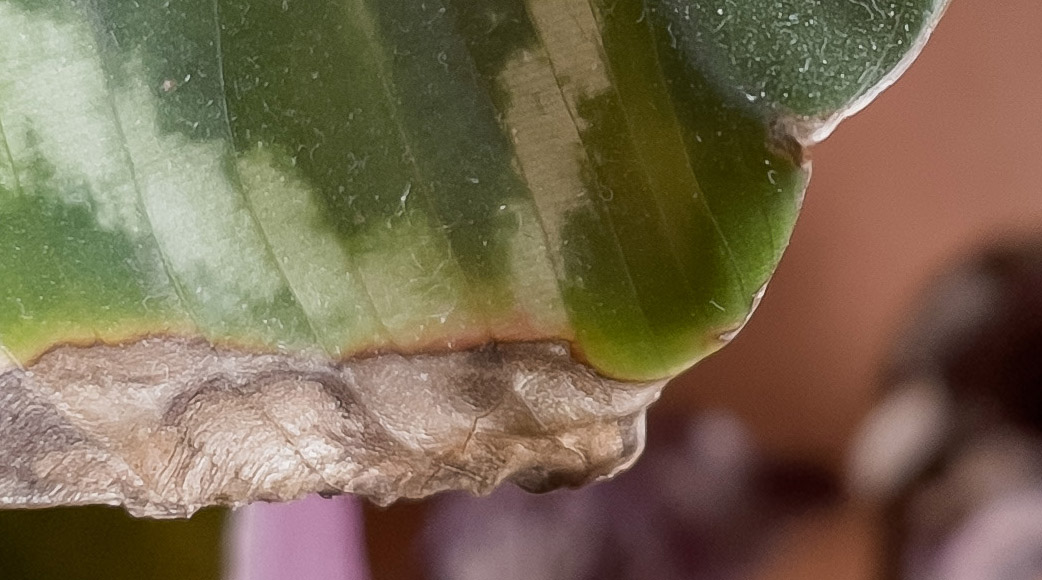
These two images look pretty close to me. Parts of each are a little bit sharper than parts of the other. The slower shutter speed combined with a slightly moving leaf likely all contributed to that. And, while I braced my phone against a sturdy surface to take all of these photos, there may have been some camera movement as well. Alas, my phone tripod does not fit the iPhone 12.
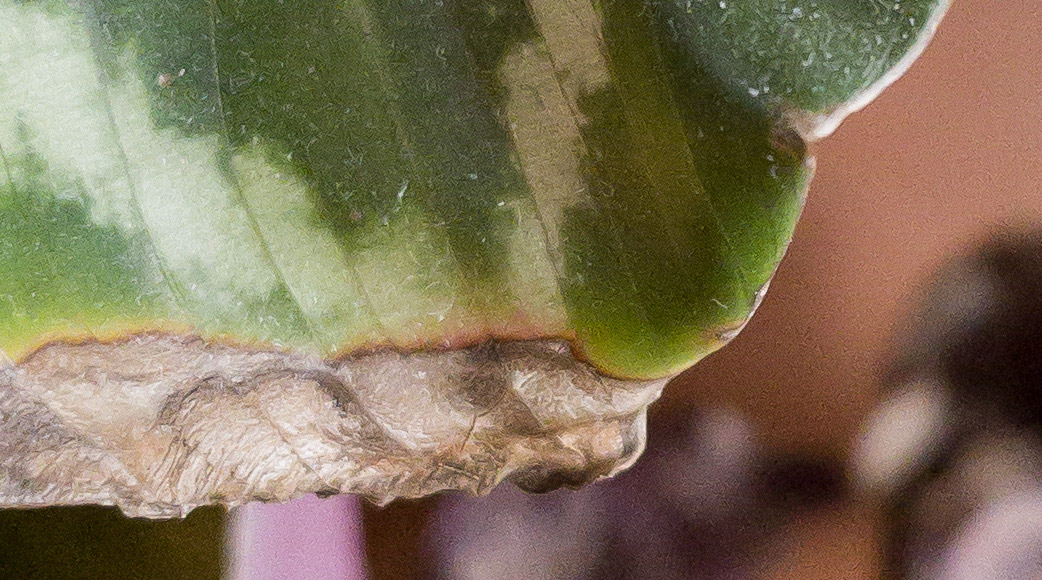
Moving to the out-of-focus areas highlights a more obvious difference:
I adjusted Lightroom’s noise reduction to the best of my abilities in that Halide image but, as the noise profile became closer to the smooth ProRAW image, I found that details in the foreground disappeared. I struggled to balance the two as successfully as they came out of the camera in the ProRAW image.
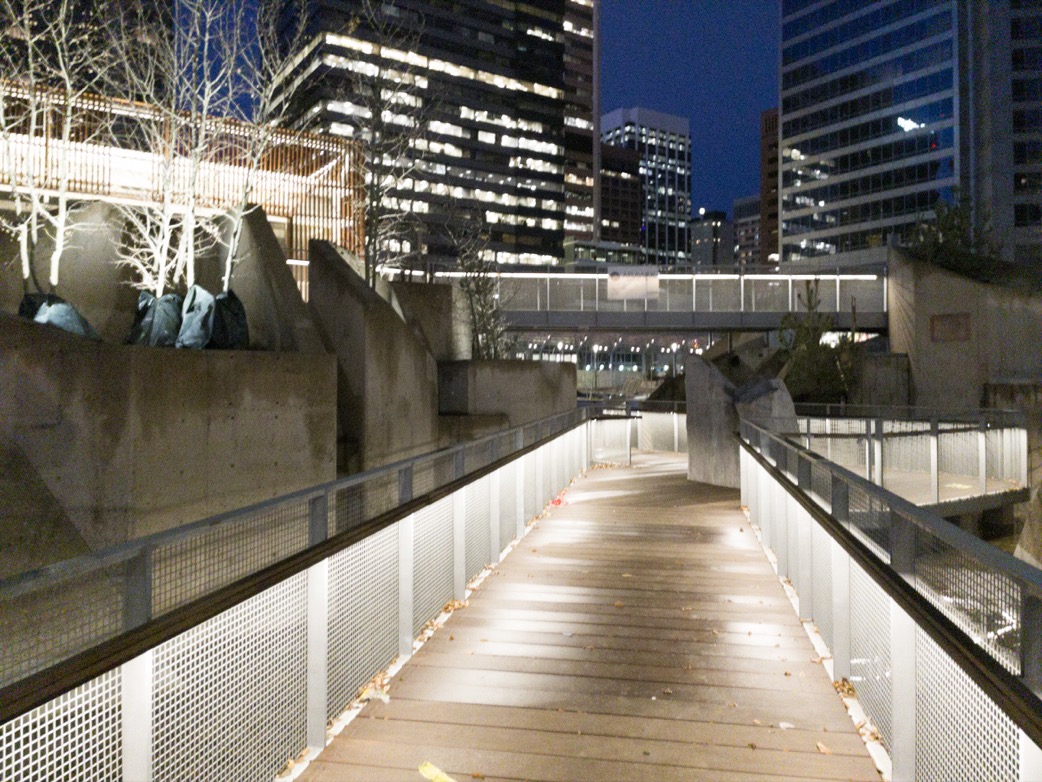
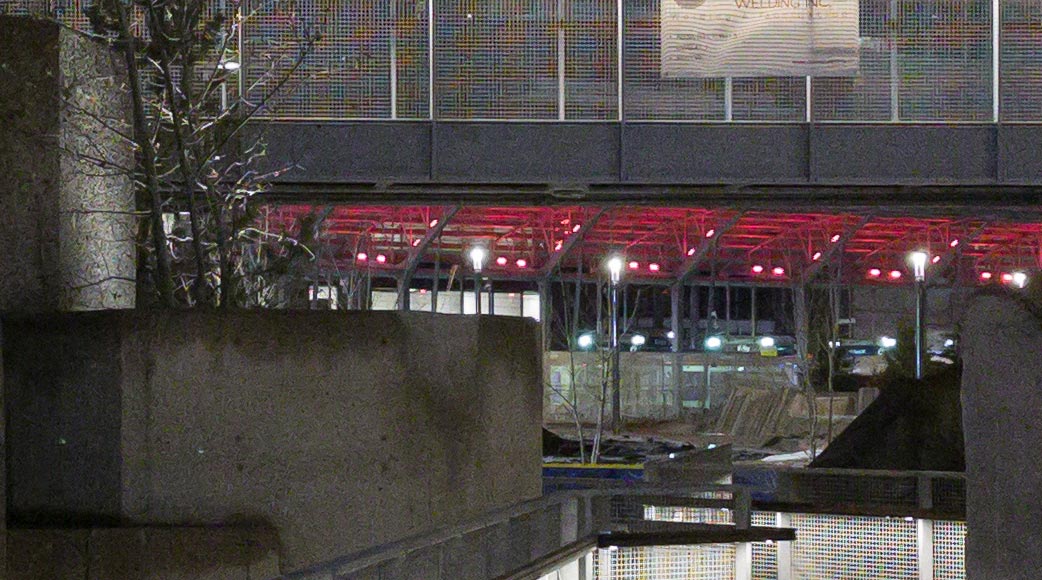
That made me think that ProRAW would be especially effective with low-light photography, so here is a series of test shots from a nighttime scene:
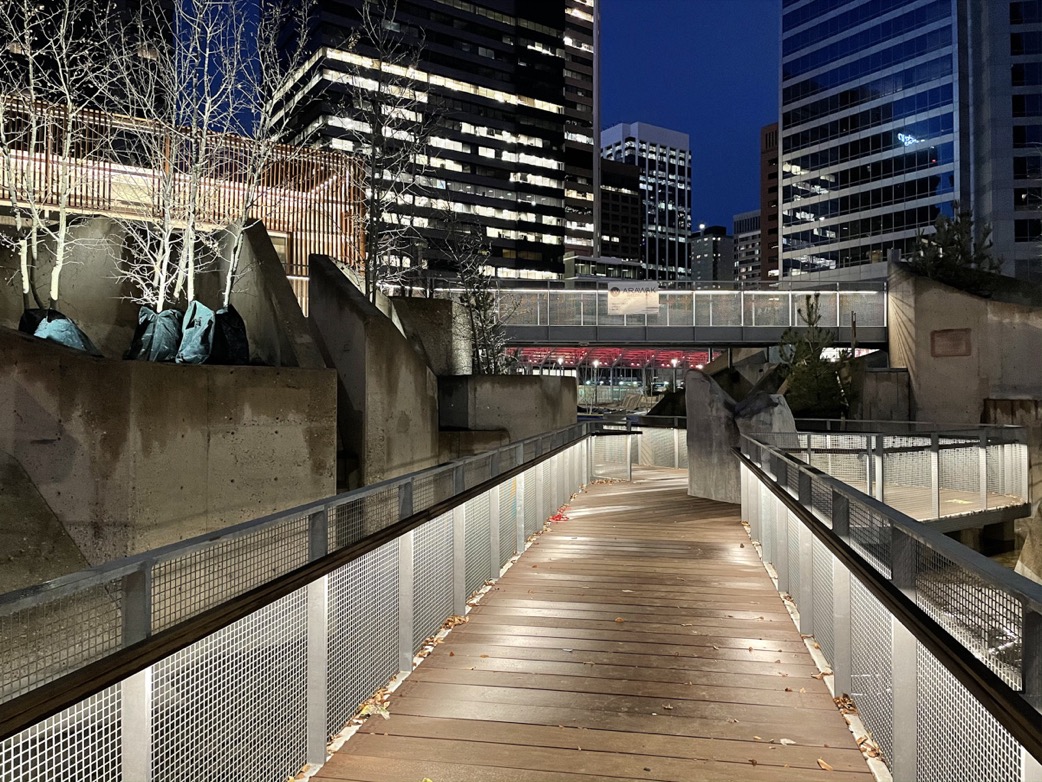
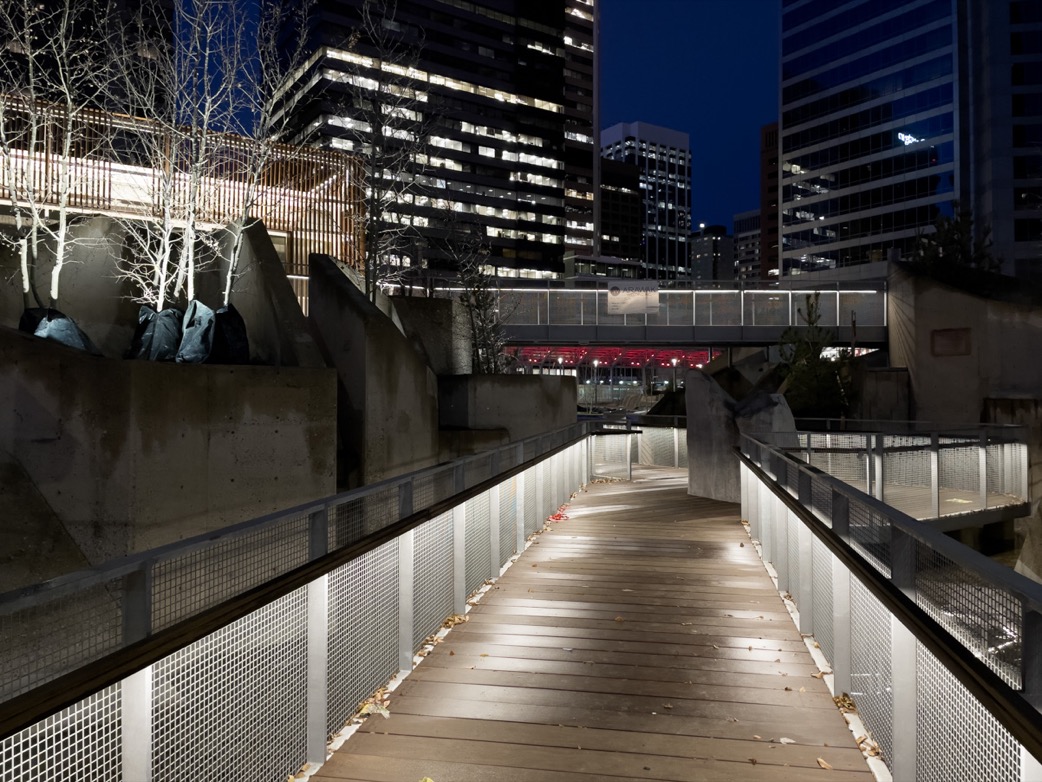
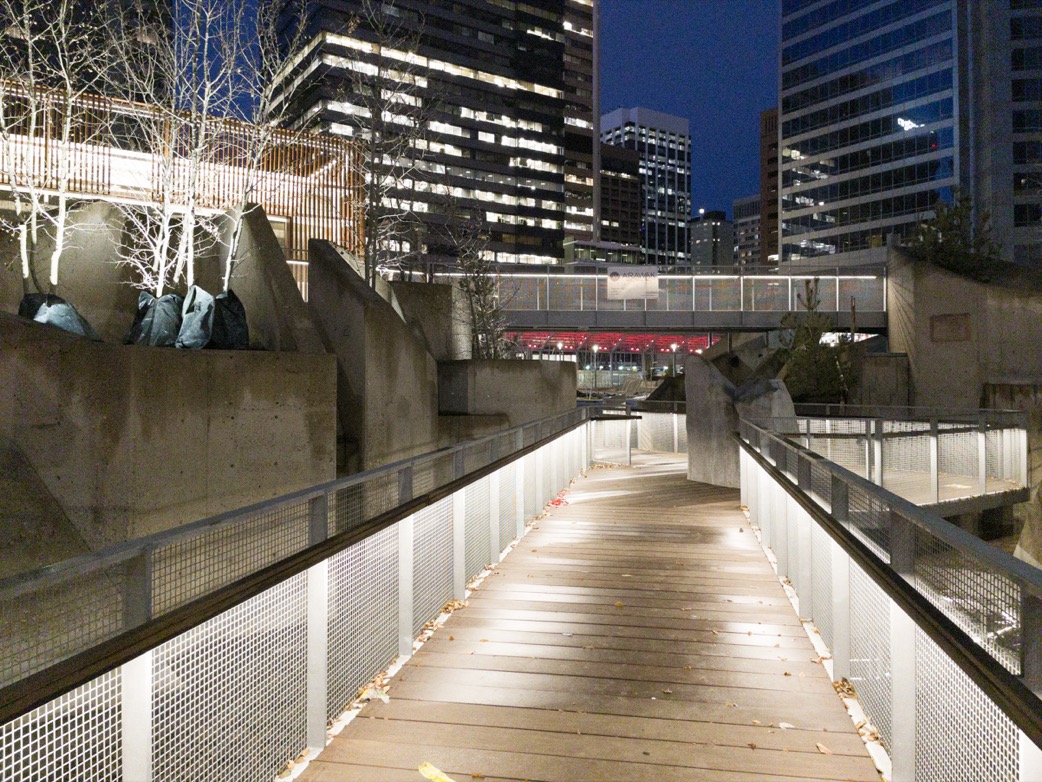
In this case, I decided to take four photos: an HEIC one, a ProRAW one, and then one RAW photo in each Halide and Obscura. I know that I have pointed out a few times in this piece that Halide’s images are grainier than the ProRAW samples. I want to be clear that I do not see this as a problem with Halide, nor am I bashing the app. I really like Halide. But, to make sure that I wasn’t missing anything, I wanted to see what the results would be from another third-party RAW-shooting camera app, and I also really like Obscura. Here are some things to know about the photos above:
The grain, lighting, and contrast all look very similar. Too similar. So I checked the DNG tags and they are virtually identical. I asked Obscura developer Ben Rice McCarthy about this and they said that the system takes care of those tags and that Obscura does not write them. That aligns with the documentation I found, which shows only a handful of options for processing RAW files compared to the long list of tags in Adobe’s DNG spec.
I braced the camera against a construction fence to take these pictures, but my efforts were not good enough and resulted in a blurry Halide image. I will not be using it for any detail comparisons.
As I mentioned earlier, it is more worthwhile to compare details if both of the RAW images are processed to look similar, so that is what you will see below. First, here are some leaves in the foreground:
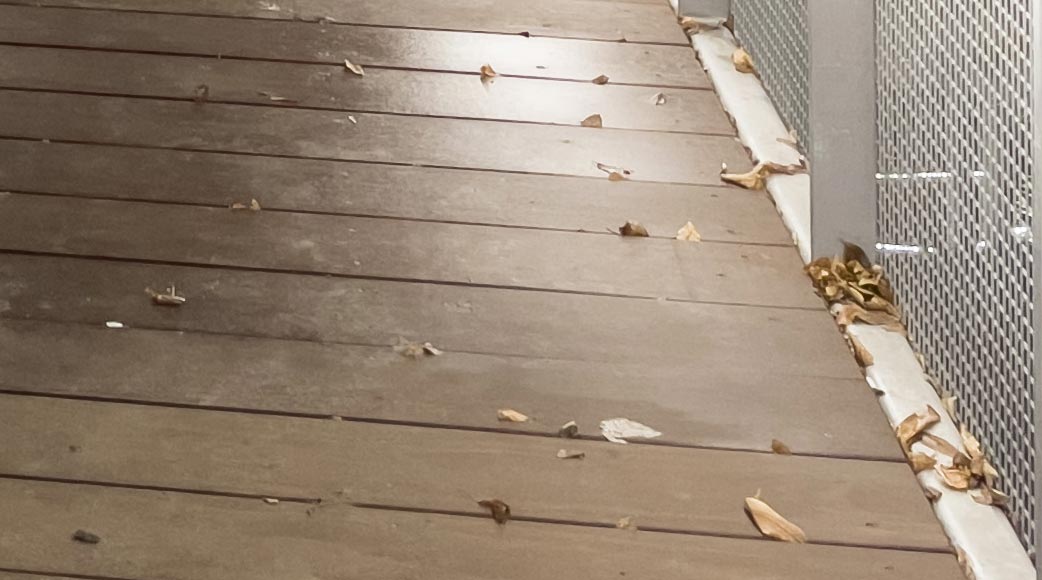
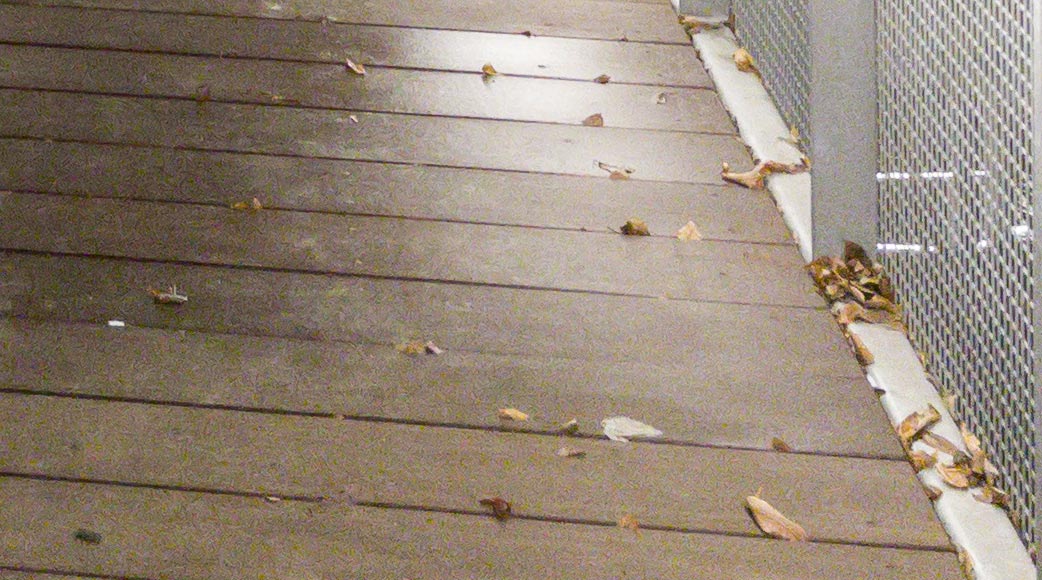
In this case, I think the Obscura image looks far better. Yes, I know there’s more noise, but that cluster of leaves is actually recognizable as leaves. The smoothing in the ProRAW image creates an image with less fidelity and, critically, there does not appear to be a way to decrease the pre-applied noise reduction. You can see similar smearing in the train station in the background, but you can also see a somewhat demoired wire fence, which is nice:
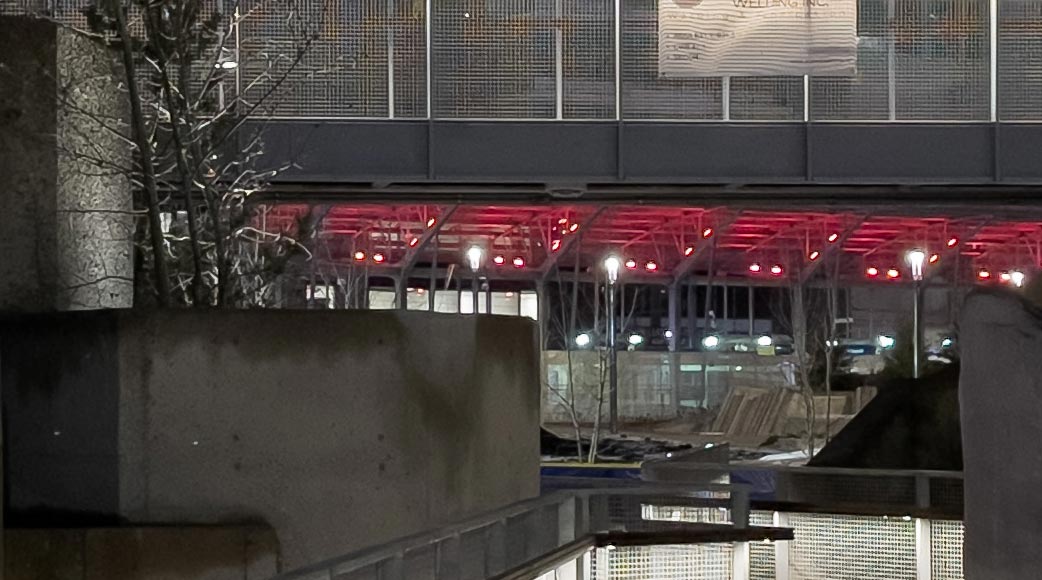
But the ProRAW format’s aggressive noise reduction works out okay for the building on the right, as well as the sky:
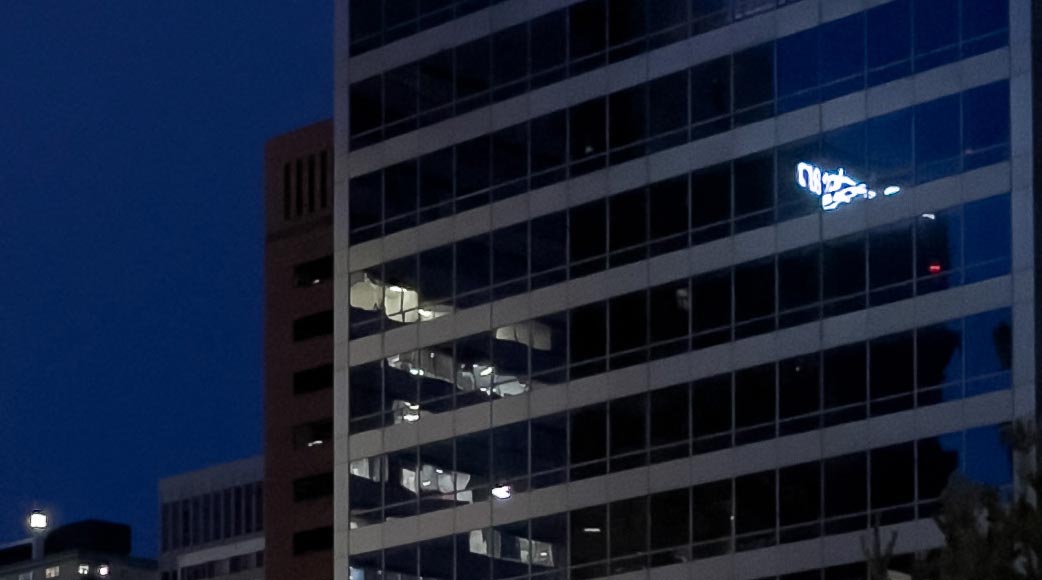
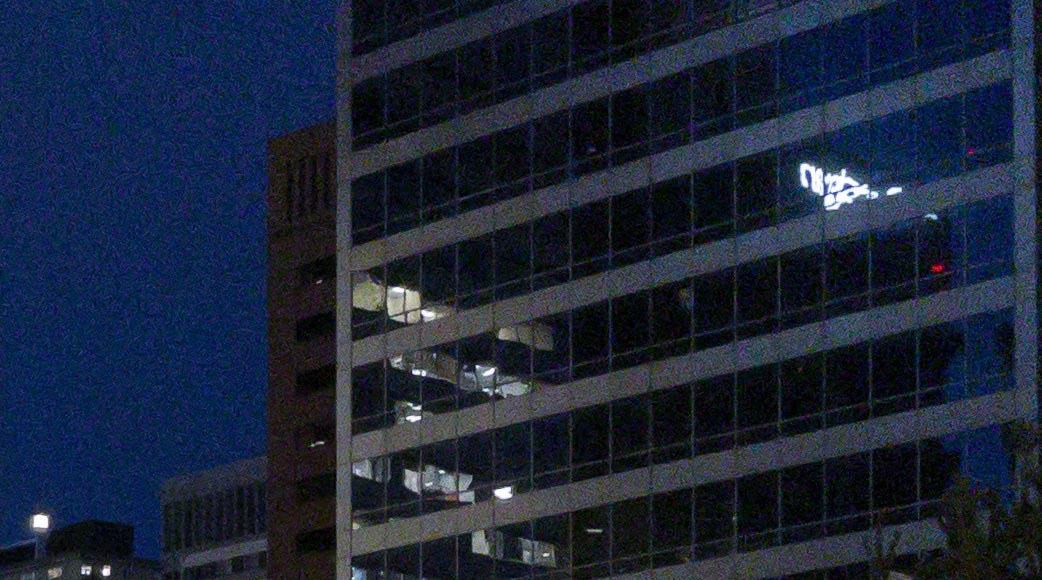
So, I am not sure I was correct — I don’t know that ProRAW is particularly good in low-light scenes. One of the advantages of RAW is that the photographer can choose their own adjustments, including balancing noise and detail. In the ProRAW world, that choice has been made and I cannot find a way to dial it back with the tools at my disposal. It isn’t like the Noise Reduction slider in Lightroom is at a preset amount; it is at zero, yet noise has been reduced within the file. The Obscura image is far grainier, but I think it is possible to bring the noise down to manageable levels while preserving many of the details that have been smeared together in the ProRAW example.
This particular example is quite challenging, with many fine lines and small details in a high-contrast setting at night. But I found similar results with fine detail in many ProRAW photos shot in the dark. This is a representative — albeit exaggerated — sample.
All of the example images so far have been made with the main “wide” camera on the iPhone 12 Pro, as it is the one with the biggest sensor, widest aperture, and creates the best quality images. But I have a few thoughts on ProRAW on the other three cameras:
The telephoto experience is very similar to the examples above, with one main exception: the first-party Camera app will continue to digitally zoom images from the “wide” camera in telephoto mode if it feels there is not enough light for the telephoto camera. This remains the case in ProRAW mode, and there is no immediate way of knowing when it is happening.
This is maybe the most irritating characteristic of something called “ProRAW” and explicitly marketed for its “absurd amount of creative control”. If you select the telephoto camera in third-party apps, you’re guaranteed to get the telephoto camera; in Apple’s app, you may or may not, and you have no way of knowing until you inspect the photo’s metadata.
ProRAW brings RAW photography to the iPhone’s ultrawide camera for the first time, and it is excellent. Its specs land it in a solid third place of the four cameras on an iPhone, but RAW brings more flexibility to that camera. There is still a surprising level of noise reduction, but I have found it to be more detailed and, naturally, more flexible than its HEIC cousin.
Apple has said that third-party app developers will be able to take advantage of the ProRAW pipeline, but it is unclear to me whether they will also be able to capture unprocessed image data from the ultrawide camera.
ProRAW is also available on the front-facing selfie camera. I am sure some photographers will be excited about the creative prospects of this, but it is the smallest sensor and lowest-quality camera of the four — and it shows.
I hope this gives you a sense of how ProRAW works and how it differs from the RAW capture that third-party apps have been offering for the past four years. As I mentioned, I have been trying out ProRAW for about a month now, and I am very pleased. It is another tool in the iPhone photography toolbox that, for me, does not entirely replace third-party camera apps. That is a good thing; I want to see exceptional independent apps like Halide and Obscura succeed on the iPhone. It is, however, a worthwhile addition that underscores how great of a camera this telephone really is.
ProRAW also largely accomplishes the pitch Apple makes for it. I can nitpick the amount of control a photographer has with ProRAW compared to other RAW capturing apps, but one thing I have been consistently impressed by is just how similar the HEIC and ProRAW versions of the same scene appear. It really does seem like Apple has managed to bridge the computational workflow of the standard camera app and the greater flexibility and quality of RAW images. I bet photographers will be pleased.
-
To create these test shots, I first photographed a scene in the first-party Camera app in standard HEIC mode. Everything was set to auto except the flash, which was switched off, and I tapped to set the focus and exposure. I then tapped the RAW toggle to capture a ProRAW file. I used the Exify extension to view the exposure settings, and attempted to replicate them as closely as I could to capture a standard RAW file in third-party camera apps like Halide and Obscura.
All photos were AirDropped to my Mac, imported into Lightroom Classic, and then exported without any adjustments except resizing to fit, unless otherwise noted. Images were exported as JPEG files with P3 colour space at quality setting 80. All metadata fields except location information were preserved. ↥︎